PacketFence is an open-source Network Access Control (NAC) solution that manages network access by enforcing authentication, authorisation, and accounting while providing captive portal capabilities, BYOD registration, and network isolation for non-compliant devices. This guide walks IT system engineers through the installation and configuration process, including setting up certificates, PKI integration, and Intune connectivity.
Initial Configuration
Accessing the Configurator
When you first boot up PacketFence, you'll be presented with a console interface. The default credentials are:
Username: root
Password: p@ck3tf3nc3
Changing the Root Password
For security reasons, change the default root password immediately:
# as root
passwd
# follow prompts to set a new password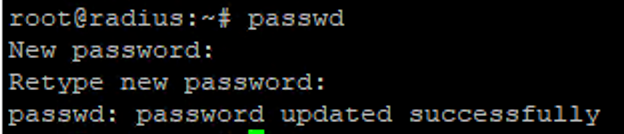
Network Configuration
During initial setup, you'll need to configure your network settings. Make sure to properly configure your network adapter settings based on your environment requirements. PacketFence typically requires multiple network interfaces to separate management traffic from enforcement networks.
Network planning
Plan your network segmentation carefully before configuring PacketFence. The solution works best when you have clearly defined management, registration, isolation, and production networks.
When configuring network interfaces, you'll need to assign static IP addresses to your management interface and determine which interfaces will handle PacketFence's enforcement mechanisms. The configurator will guide you through setting up:
- Management network (for administration)
- Registration network (for device onboarding)
- Isolation network (for quarantining non-compliant devices)
- Production networks (for normal network access)
Finishing Basic Setup
Complete the configurator by following the on-screen prompts. When asked about Fingerbank integration, you can skip this step as it's not required for basic functionality. Make sure to save all provided passwords during setup - you'll need them later.
Save all credentials
Save all generated passwords during setup - database credentials, admin portal password, and service credentials. These are required for later configuration steps.
Setting Up Web Service Certificates
Using properly signed SSL certificates is crucial for a production PacketFence deployment. We'll implement a public signed wildcard certificate for the web server to prevent certificate warnings in the captive portal.
Converting Certificate Formats
If you have a certificate in p12/pfx format, use these commands to extract the key components:
On macOS
# extract unencrypted RSA private key
openssl pkcs12 -in bundle.p12 -nocerts -nodes | tee tmp.key | openssl pkcs8 -topk8 -nocrypt -in /dev/stdin -out server.key
# extract server cert (includes SANs)
openssl pkcs12 -in bundle.p12 -clcerts -nokeys -out server.crt
# cleanup
rm -f tmp.key
Tip
The private key string needs to start with -----BEGIN RSA PRIVATE KEY----- and end with the corresponding footer. Also, make sure the intermediate certificate is added, otherwise the portal service over port 443 won't be available.
Installing the Web Certificate
- Navigate to System Configuration → SSL Certificates → Edit HTTP Certificates in the PacketFence admin portal
- Replace HTTP Server Certificate with the content of
server.crt - Optionally deselect Find HTTPs Server intermediate CA(s) automatically and add your intermediate cert content manually
- Replace HTTP Server Private Key with the content of
server.key - Click Save to apply changes
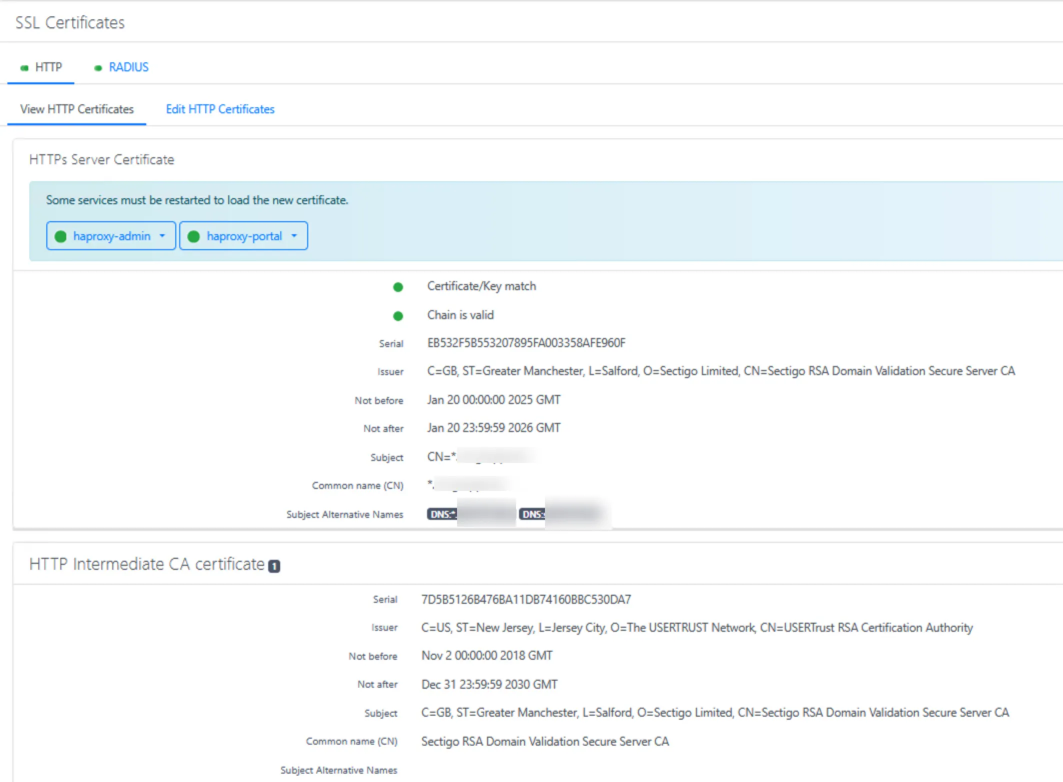
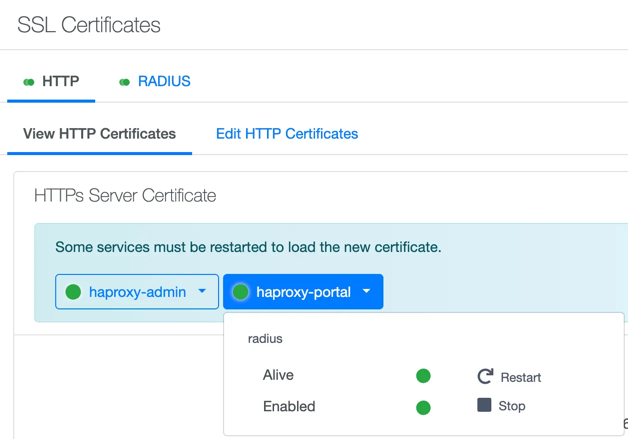
- Important: Restart services to make HTTP/80 available by clicking the "Restart" button in the confirmation dialog
Setting Up PKI Infrastructure
PacketFence includes an integrated PKI (Public Key Infrastructure) that allows you to create and manage certificates. This is particularly useful for certificate-based authentication with 802.1X, which provides stronger security than password-based methods.
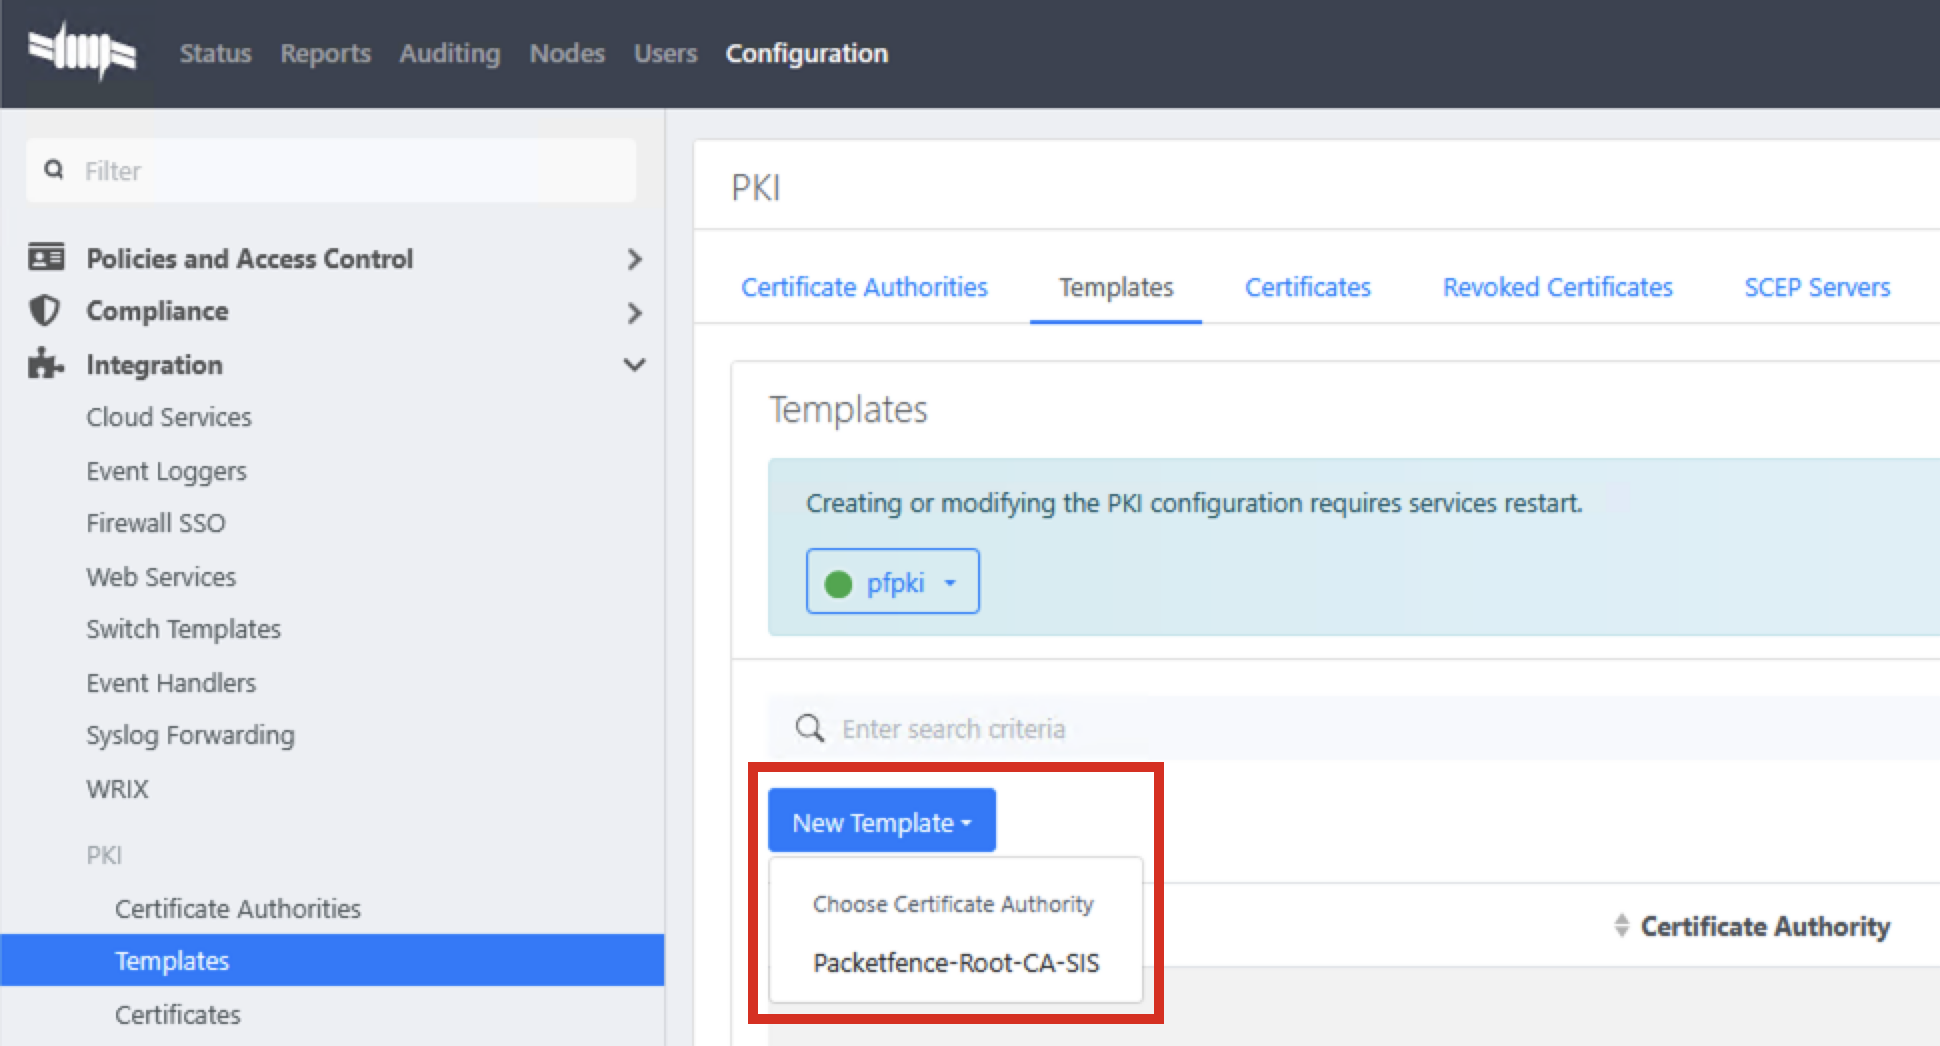
Creating a Certificate Authority
- Navigate to the PKI section and select New Certificate Authority to establish a Certificate Authority that will sign all certificates used in your environment
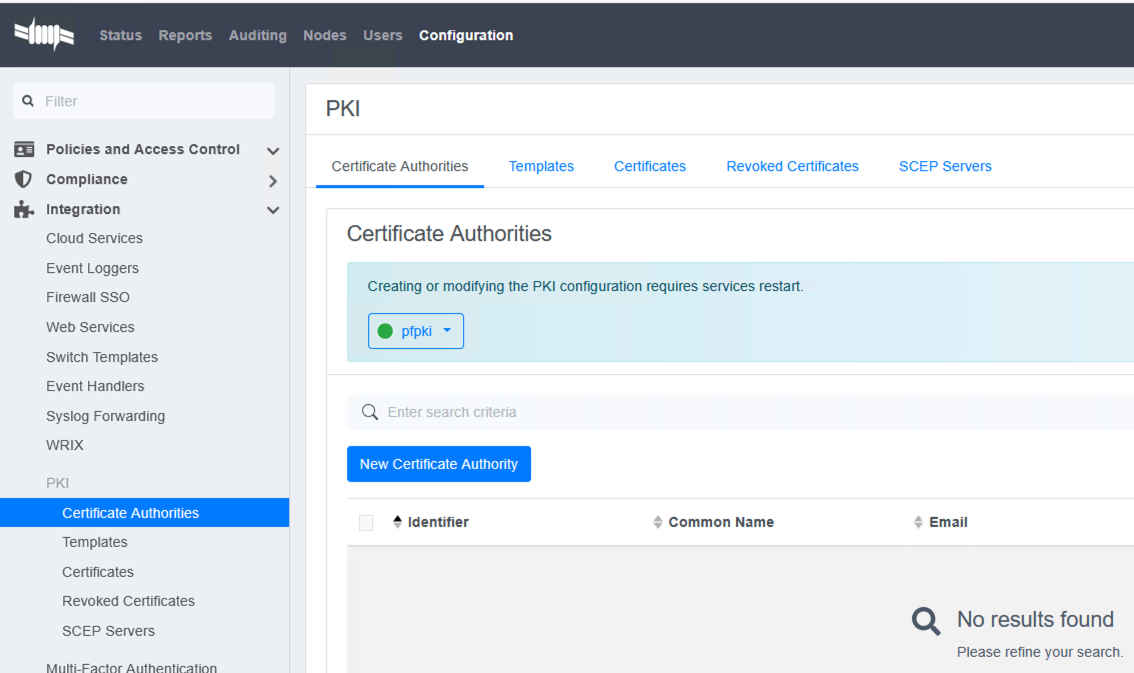
- Enter your organisation's CA details and save. Include meaningful information in fields like Organisation, Organisational Unit, and Common Name

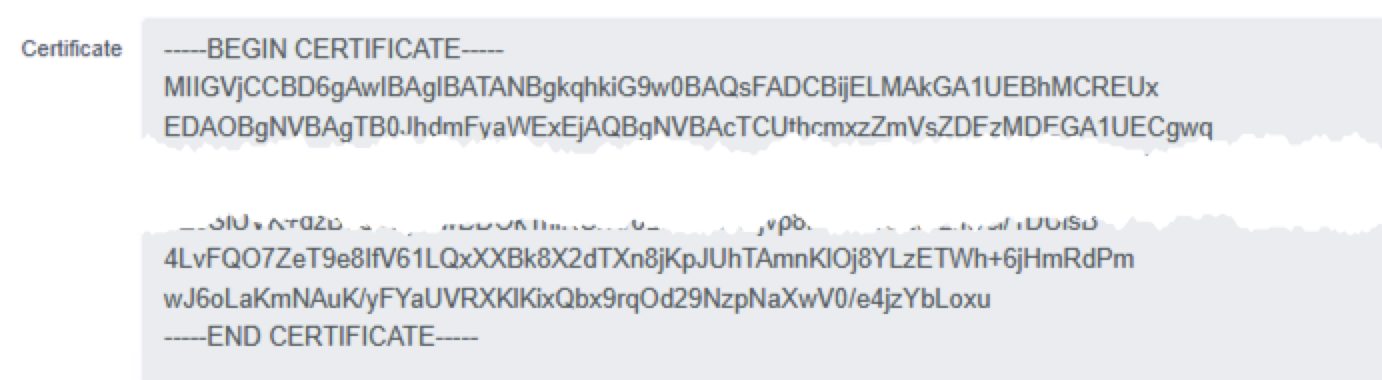
- Copy and save the CA public cert as
ca.crt- you'll need this file later for device configurations and RADIUS setup
Configuring Microsoft Intune Integration
Before creating certificate templates, set up Intune integration to enable automated certificate enrollment:
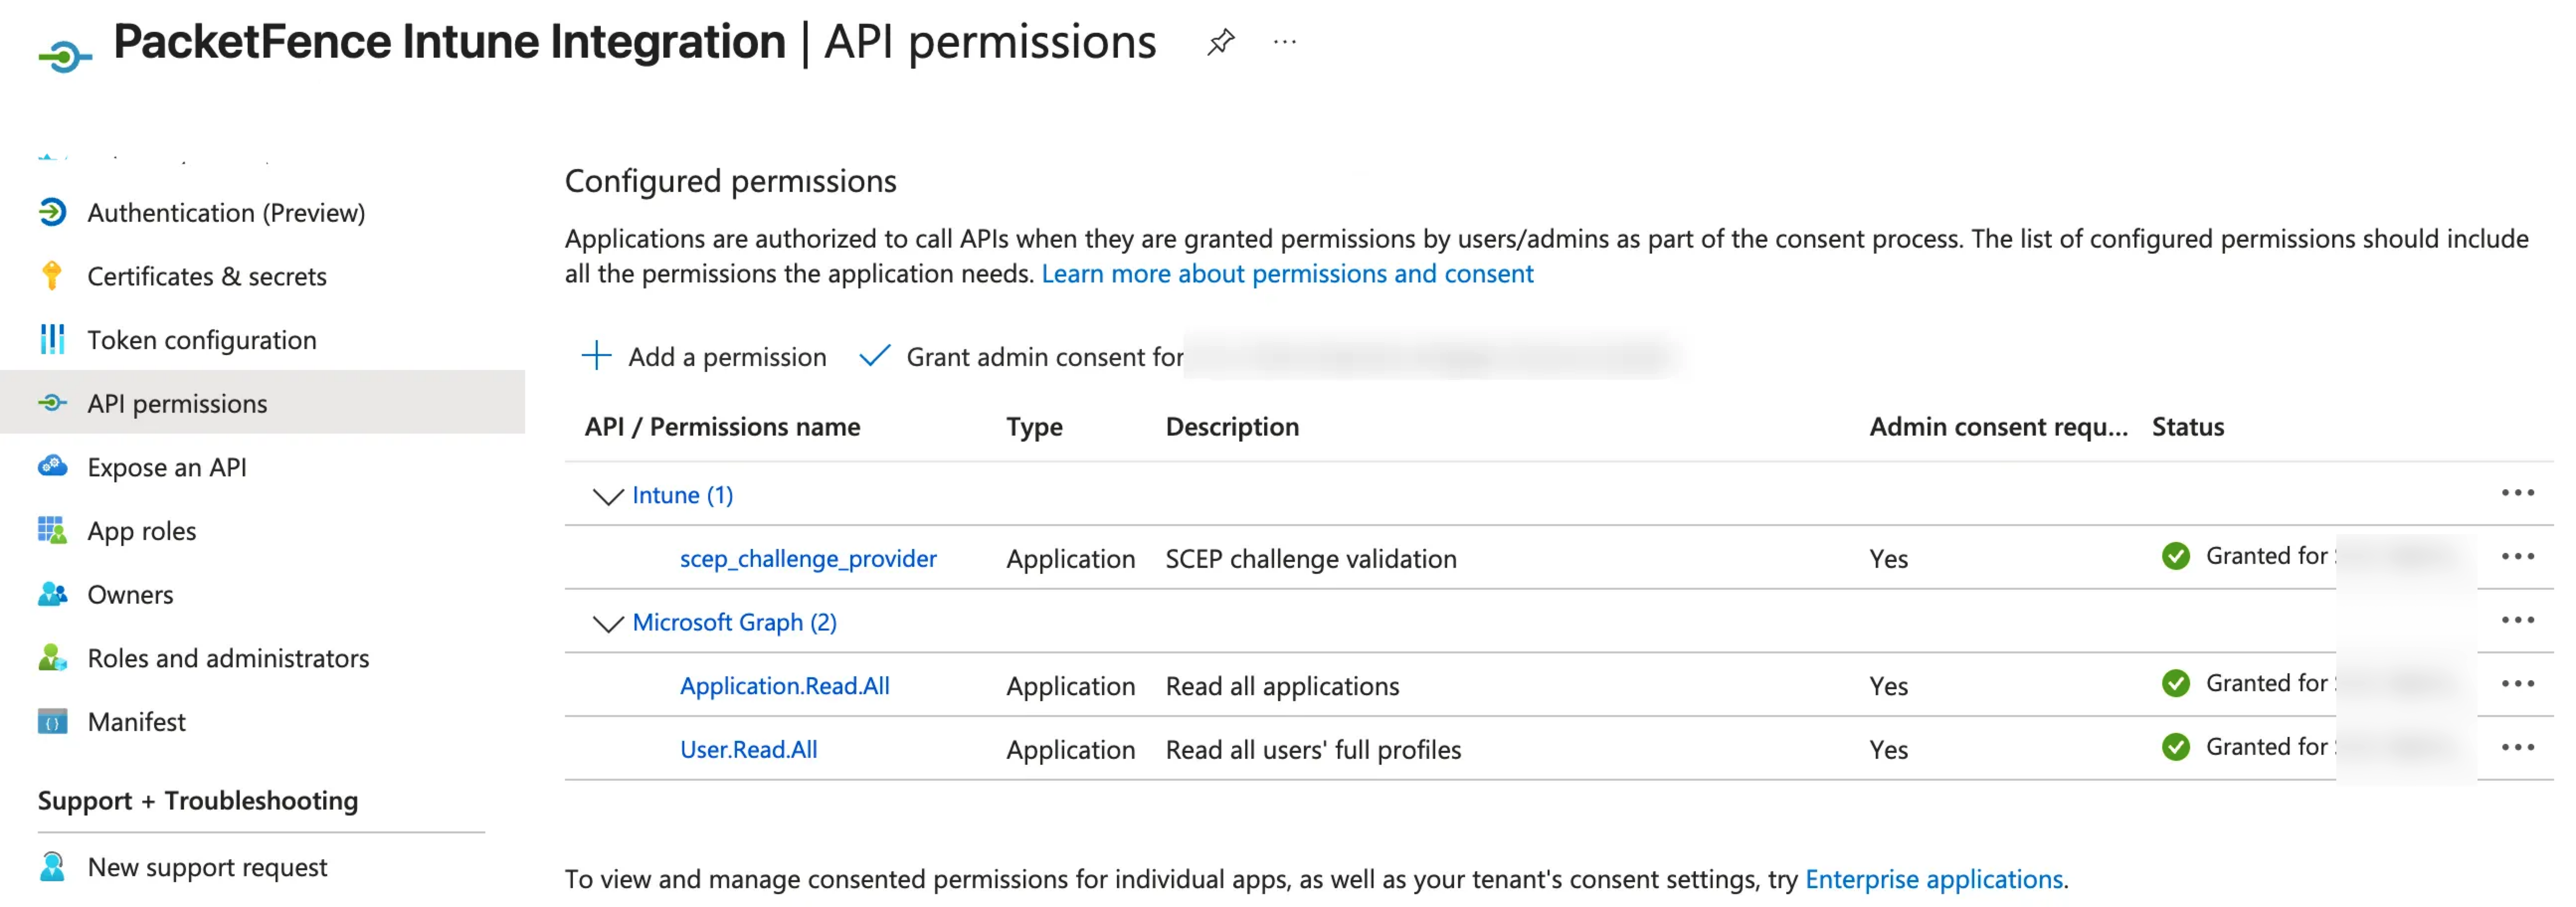
- In Microsoft Entra ID, create a new app registration with appropriate permissions for device management
- Add the following permissions to the app registration:
DeviceManagementConfiguration.ReadWrite.AllDeviceManagementManagedDevices.ReadWrite.AllDeviceManagementServiceConfig.ReadWrite.All
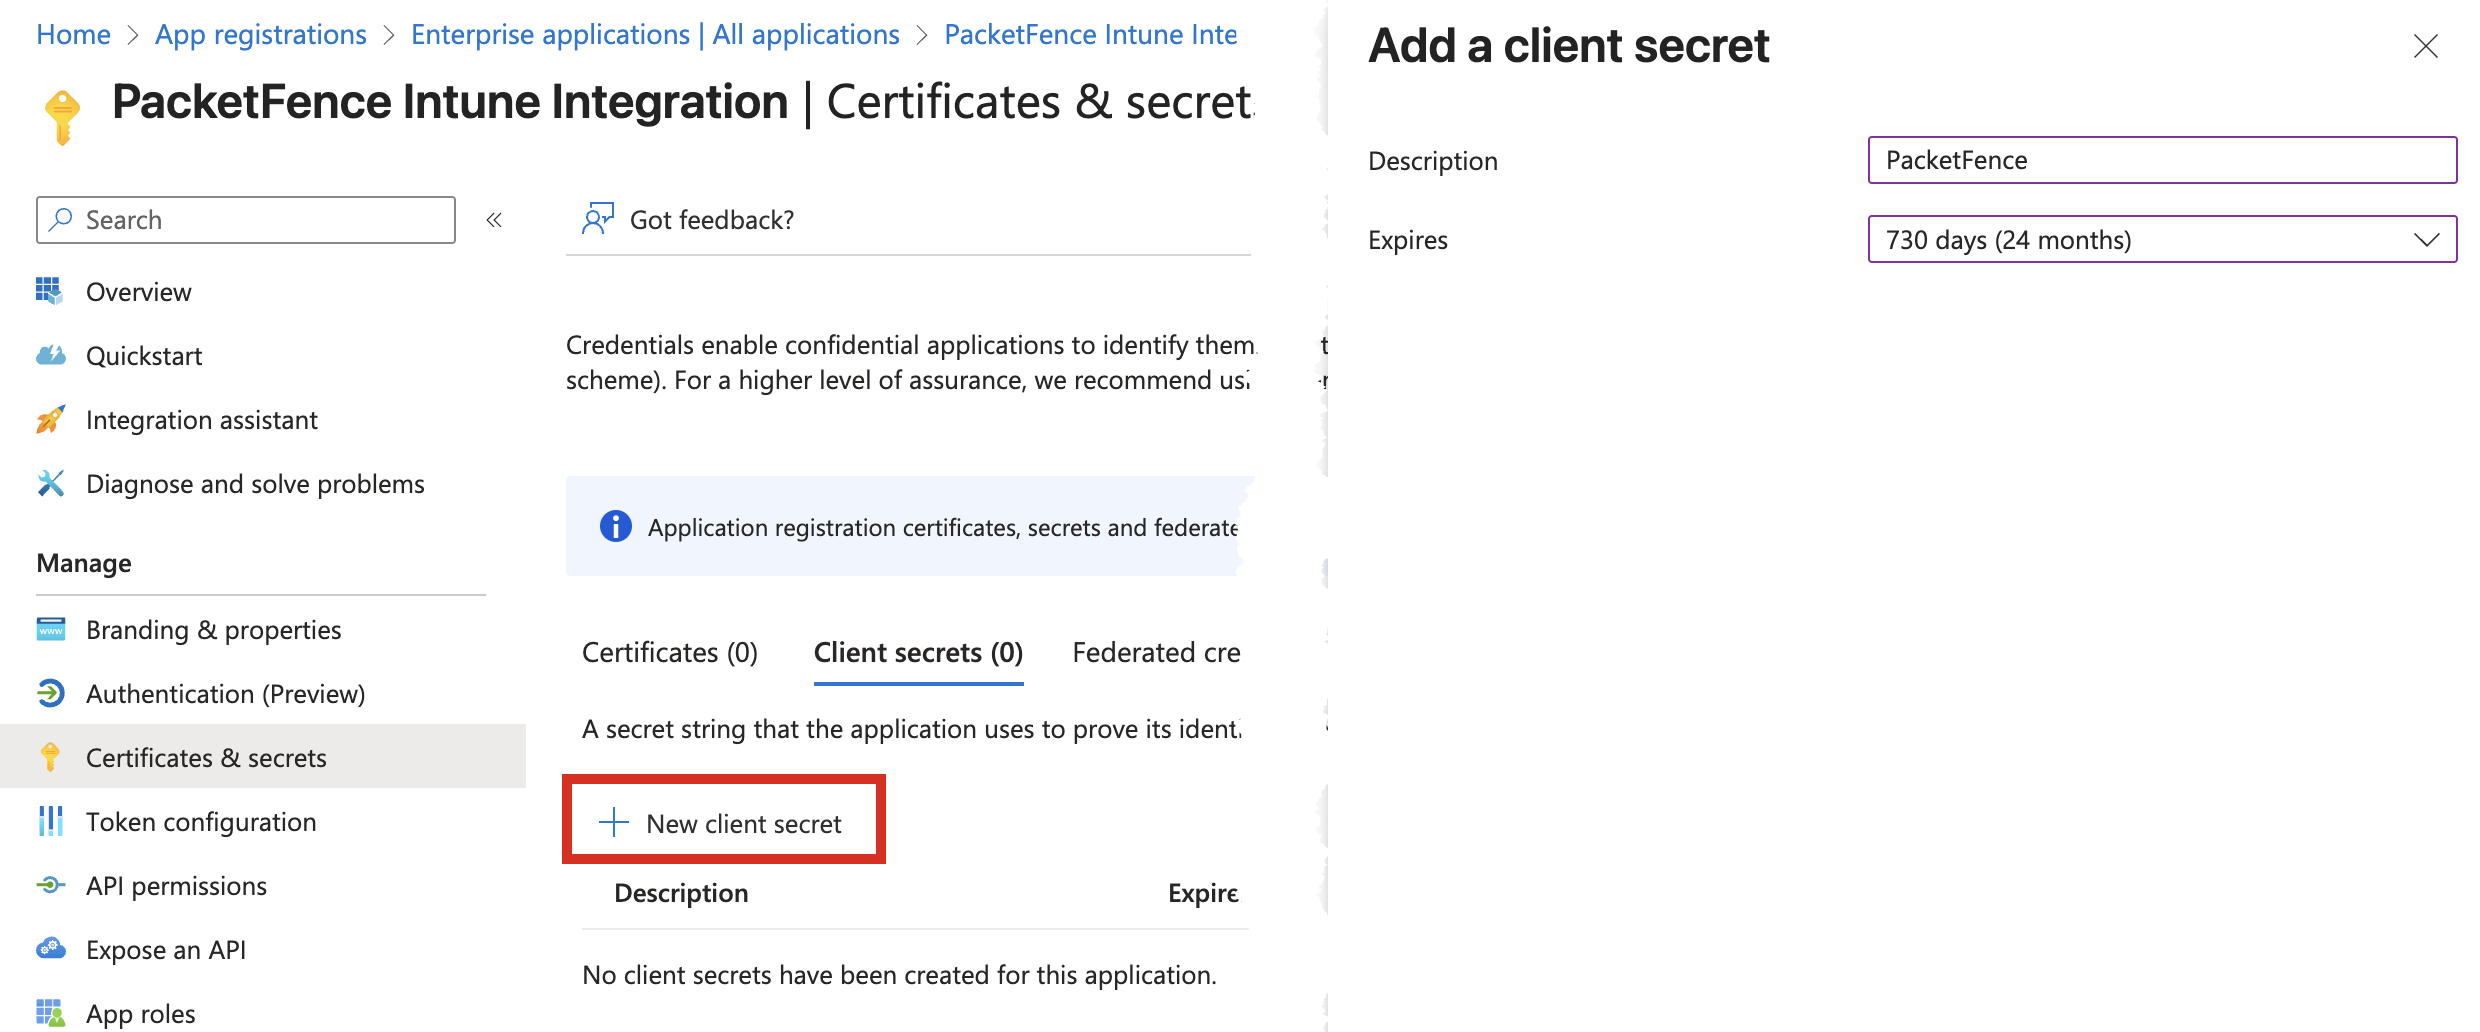
- Create a client secret and copy its value - note that this secret will only be shown once during creation
- In PacketFence, go to Configuration → Integration → Cloud Services → New Cloud Service → Intune
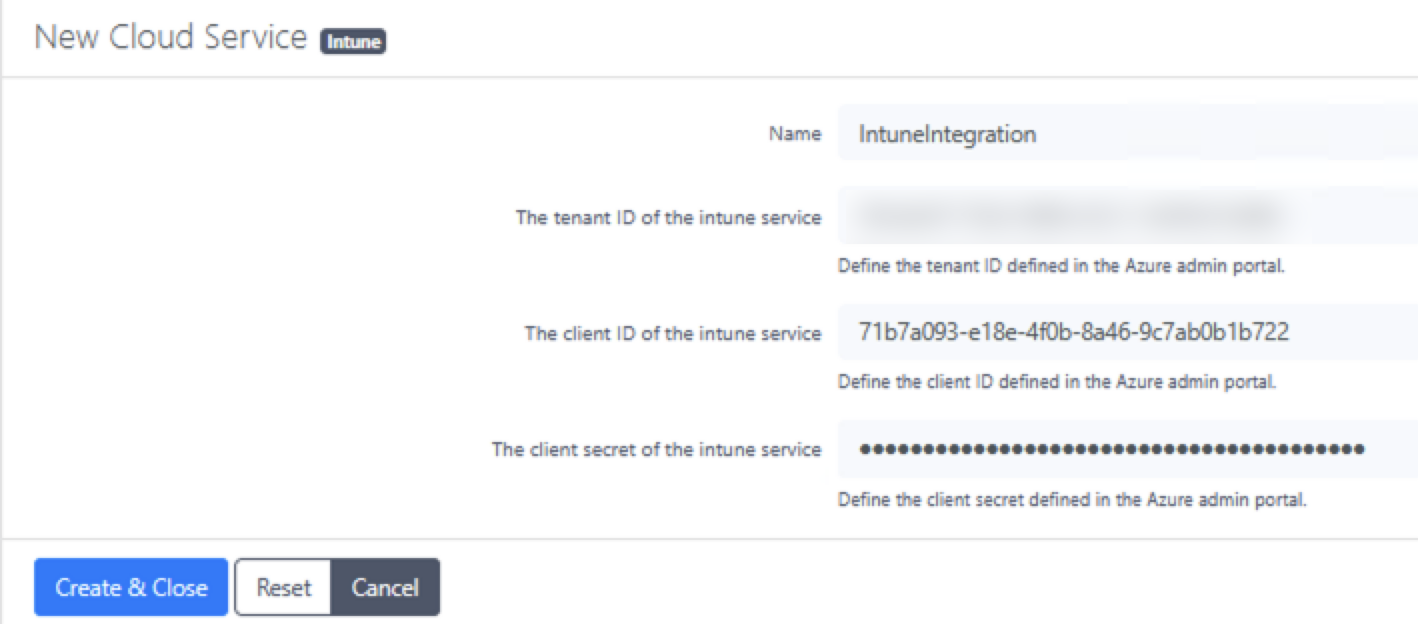
- Enter a profile name, tenant ID, client ID, and the secret created in the previous step
Creating Certificate Templates
Create two certificate templates with specific configurations:
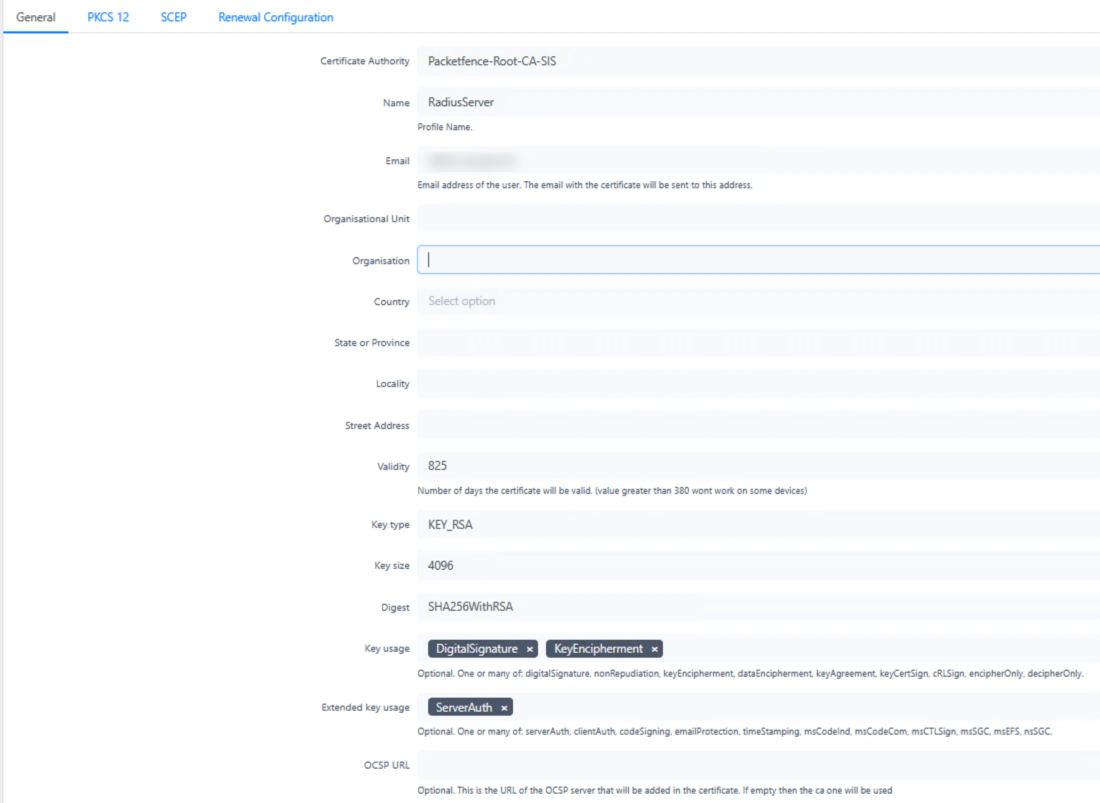
1. RADIUS Server Certificate Template
- Maximum validity: 825 days (complies with industry standards for server certificates)
- Purpose: Used for the RADIUS Server authentication
- Key Usage: Digital Signature, Key Encipherment
- Extended Key Usage: Server Authentication
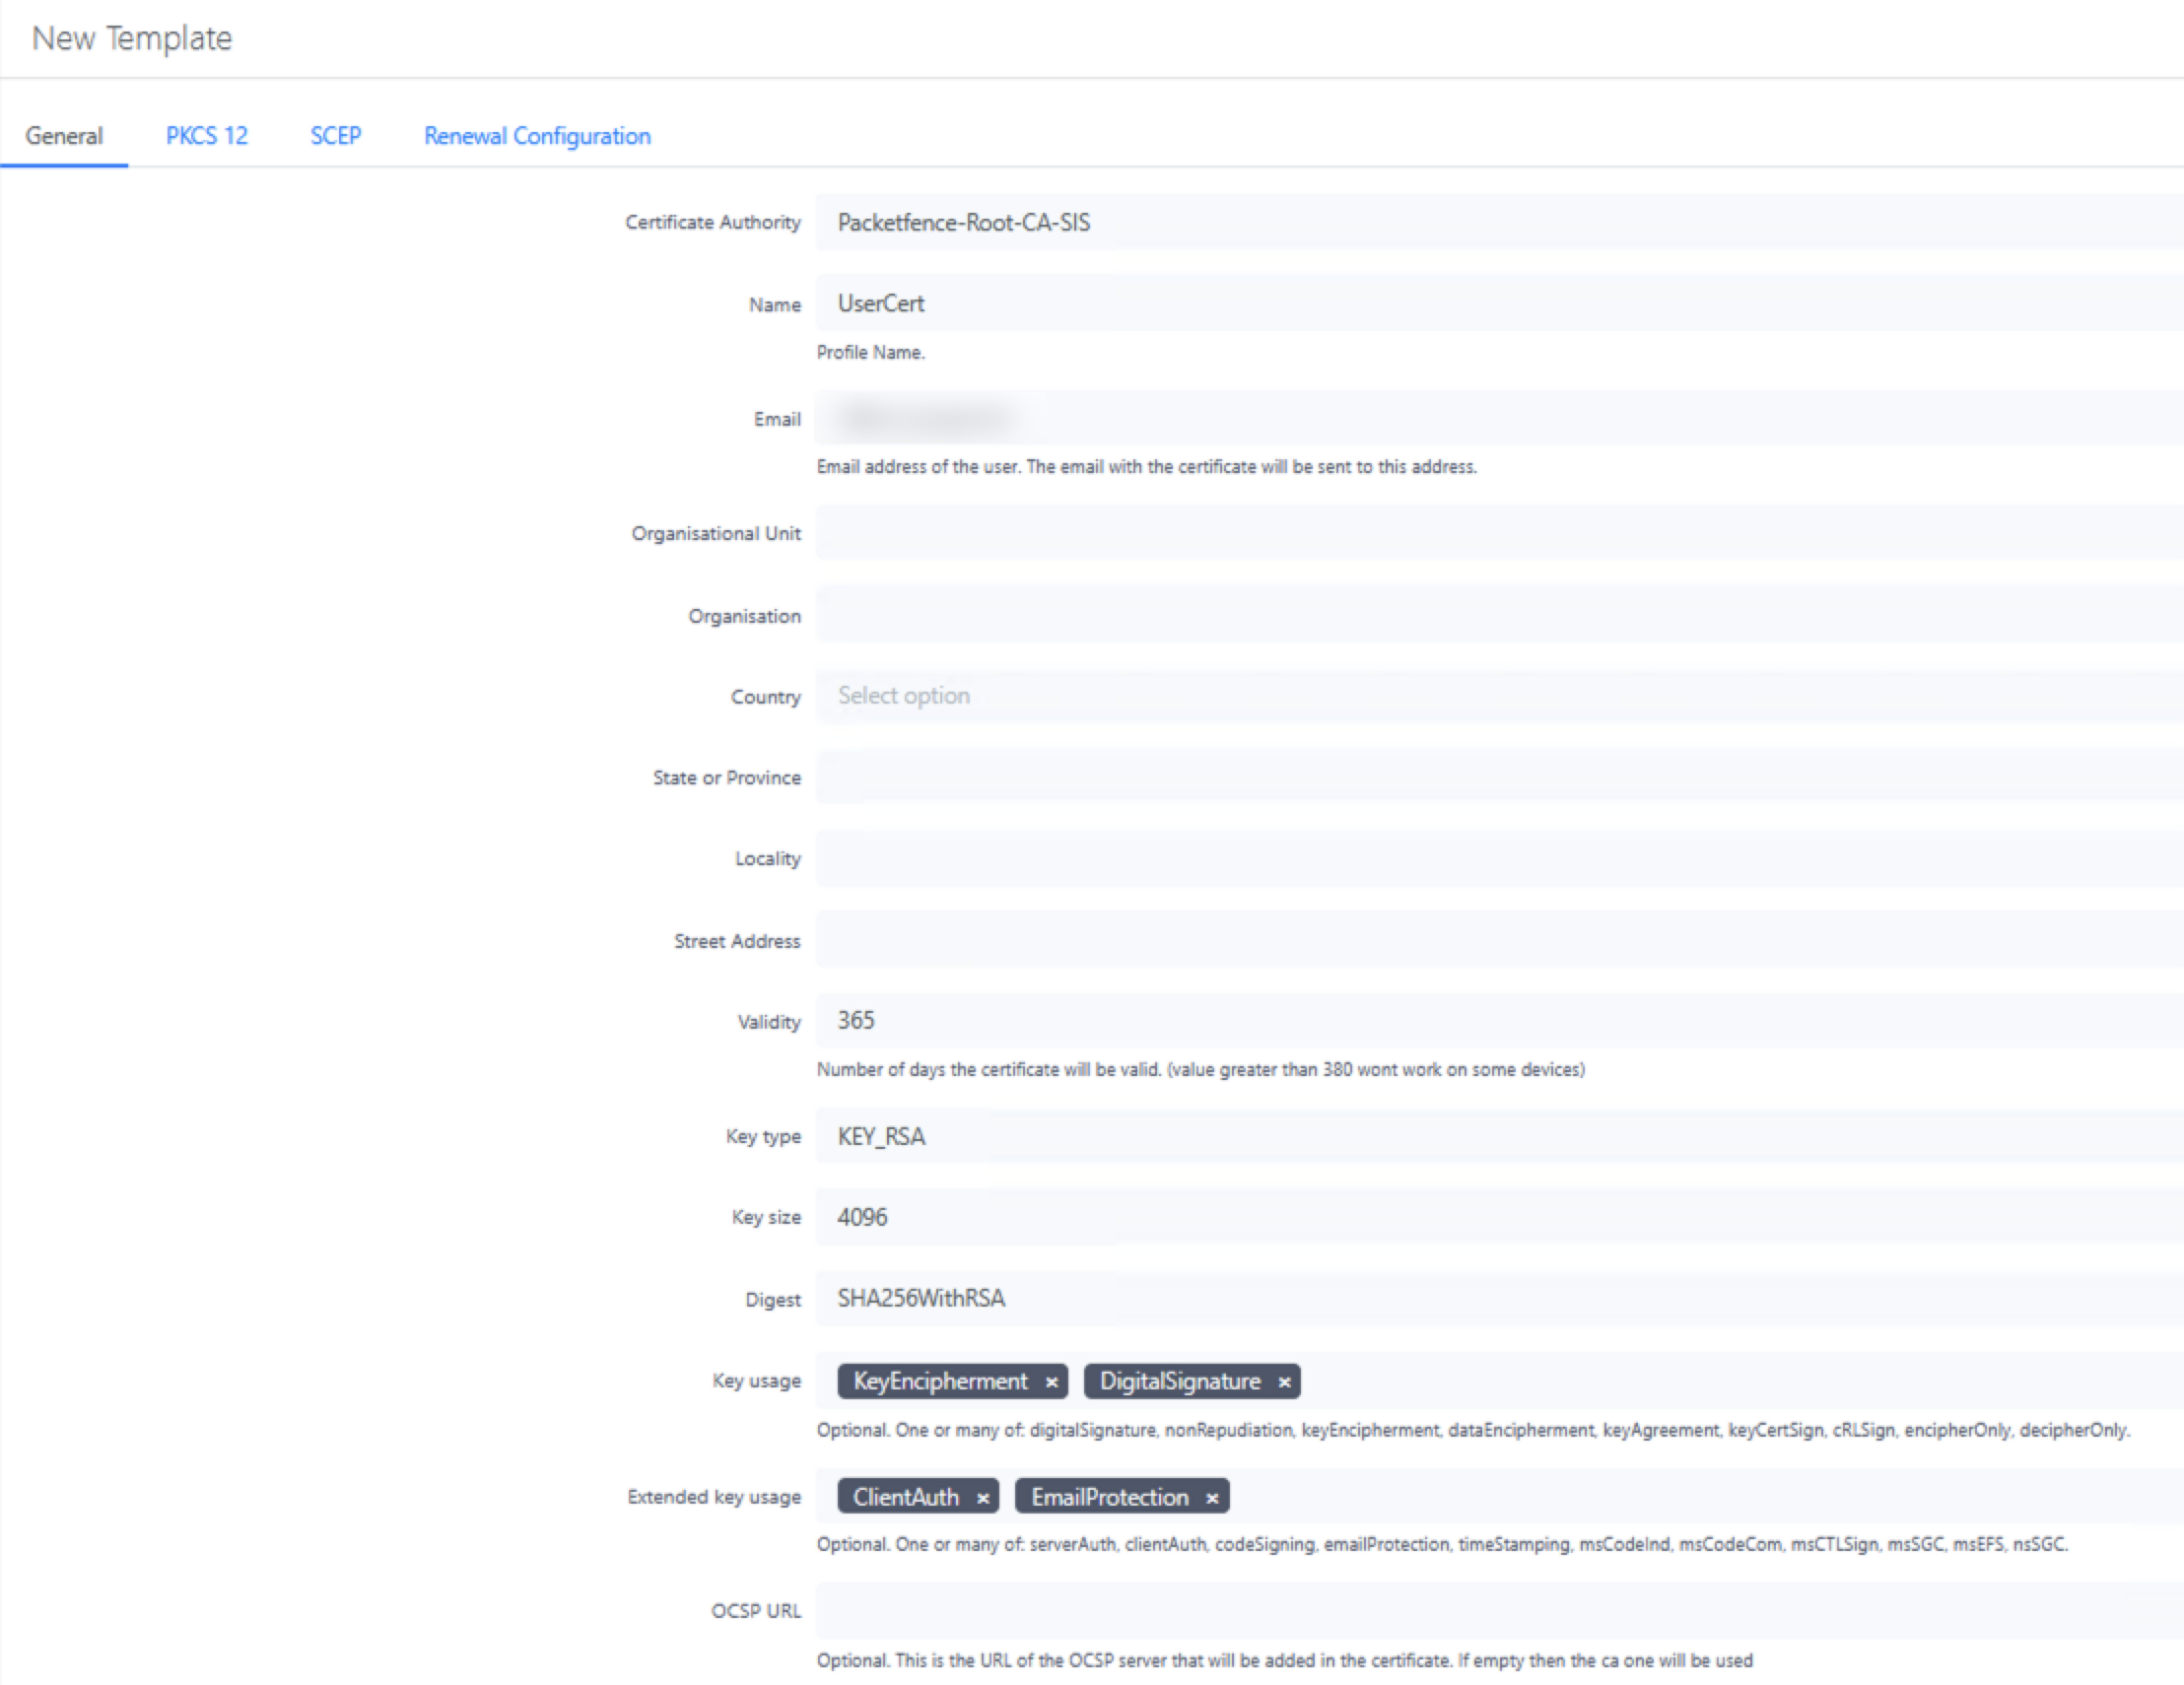
2. User Certificate Template
- Validity: 365 days
- SCEP enabled (Simple Certificate Enrollment Protocol for automated deployment)
- Cloud Intune Integration enabled
- Key Usage: Digital Signature
- Extended Key Usage: Client Authentication
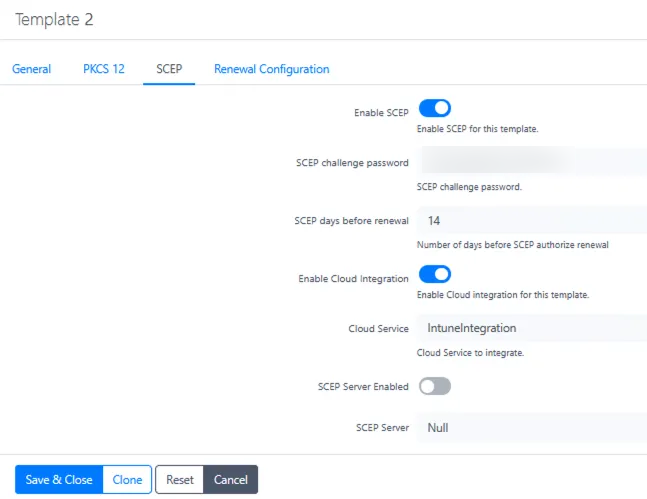
For the User Certificate template, make sure to:
- Enable SCEP in the SCEP tab to allow automated certificate enrollment
- Create a secure challenge password - this should be complex and randomly generated
- Enable Cloud Integration and select your Intune profile
Creating and Installing RADIUS Server Certificate
- Go to Integration → PKI → Certificates and create a new certificate with the RADIUS Server template
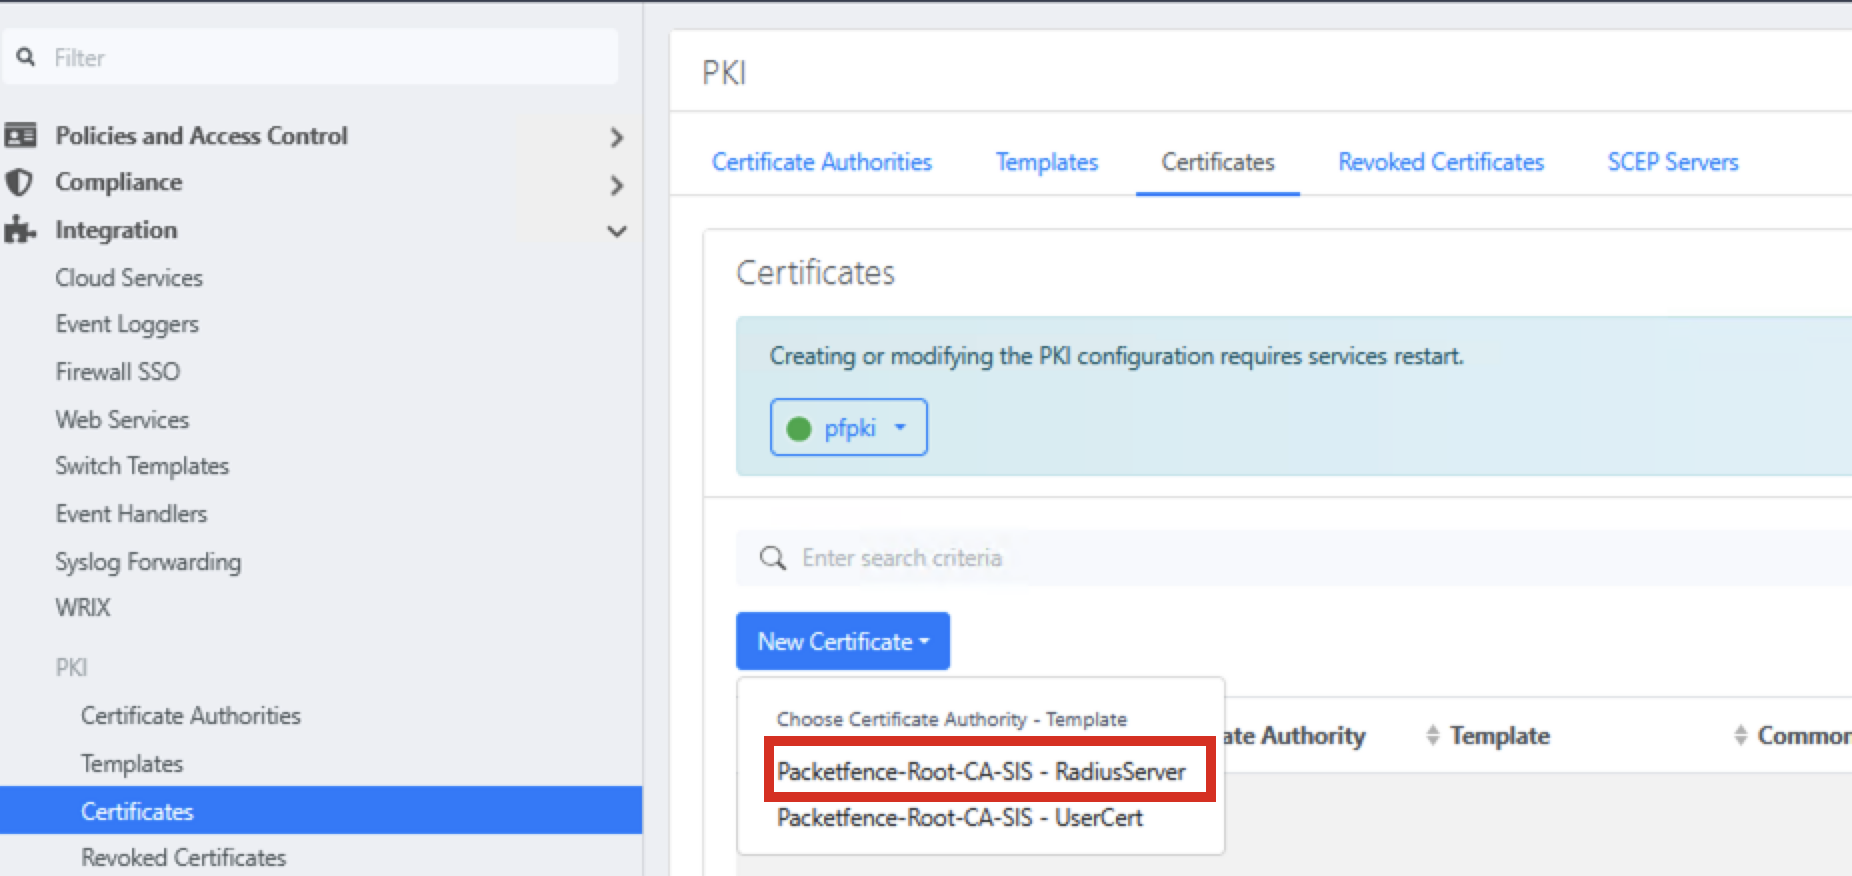
- Enter certificate details, using the FQDN of your RADIUS server for both Common Name and DNS Names
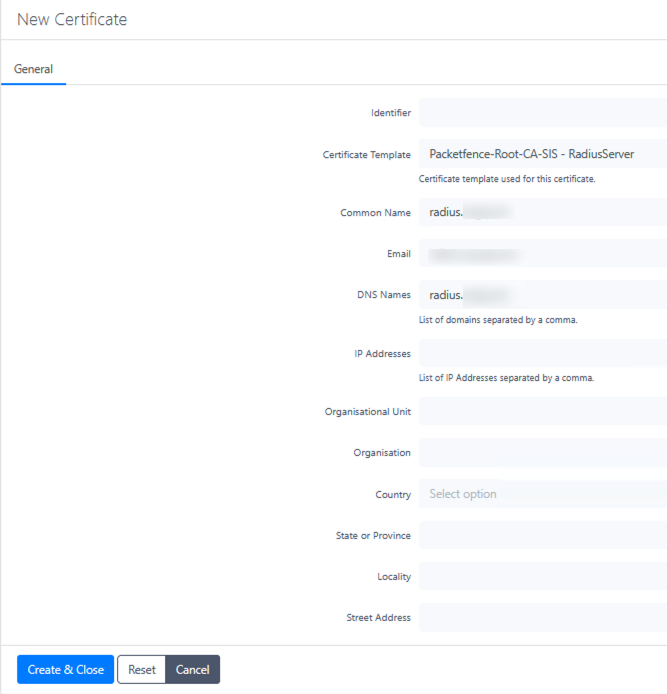
- Include all Subject Alternative Names (SANs) for any additional DNS names or IP addresses
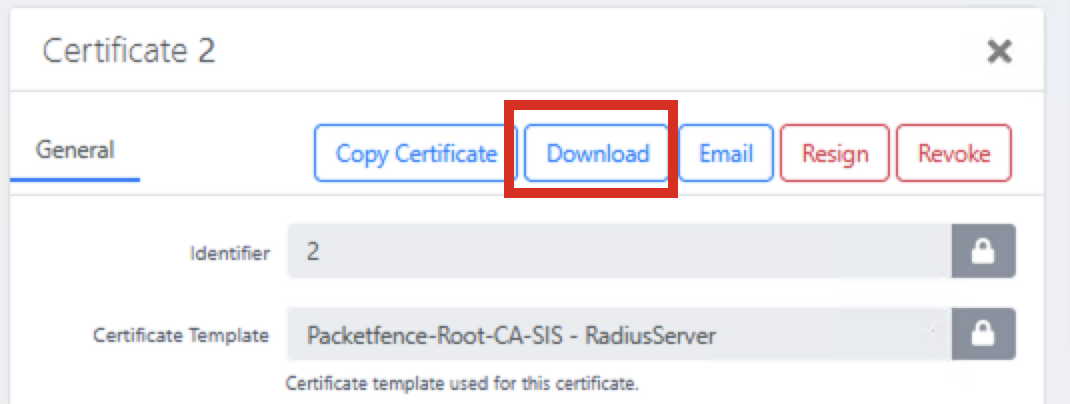
- Download the certificate bundle after creation
Extract Certificate Components
On macOS, use these commands to extract the necessary files from the certificate bundle:
# extract unencrypted RSA private key
openssl pkcs12 -in bundle.p12 -nocerts -nodes -legacy | tee tmp.key | openssl pkcs8 -topk8 -nocrypt -in /dev/stdin -out server.key
# extract server cert (includes SANs)
openssl pkcs12 -in bundle.p12 -clcerts -nokeys -out server.crt -legacy
# cleanup
rm -f tmp.key
Tip
The -legacy parameter is needed because PacketFence uses an older encryption format in its PKCS#12 files.
Install the RADIUS Certificate
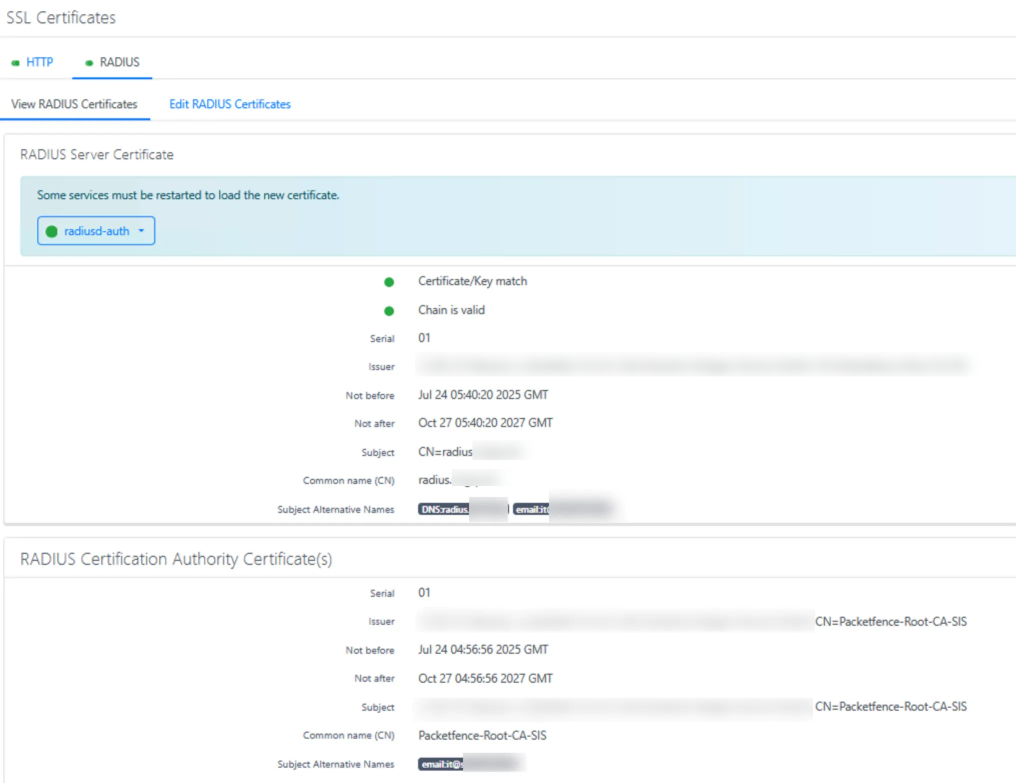
- Navigate to System Configuration → SSL Certificates → RADIUS → Edit RADIUS Certificate
- Replace RADIUS Server Certificate with the content of
server.crt - Replace RADIUS Server Private Key with the content of
server.key - Replace Certification Authority certificate with the content of
ca.crtsaved earlier - Click Save and verify the certificate details
Publishing SCEP for Mobile Device Management
To enable certificate enrollment for mobile devices, publish the SCEP endpoint to the internet using Microsoft Entra ID Application Proxy. This allows devices to request certificates regardless of their location while keeping your server protected.
Security scope
For security purposes, only publish the specific SCEP endpoint rather than exposing the entire server to the internet. Using a path-based approach (/scep/) ensures that only the certificate enrollment functionality is accessible externally.
Setting Up Application Proxy
- Go to the Entra ID Application Proxy section
- Select Configure an app to create a new application proxy configuration
- For the Internal URL:
- Use HTTP (not HTTPS) - PacketFence's SCEP endpoint runs on HTTP
- Format should be:
http://packetfence.yourdomain.com/scep/ - Add
/scep/to the FQDN for security (limit exposure to only the SCEP endpoint)
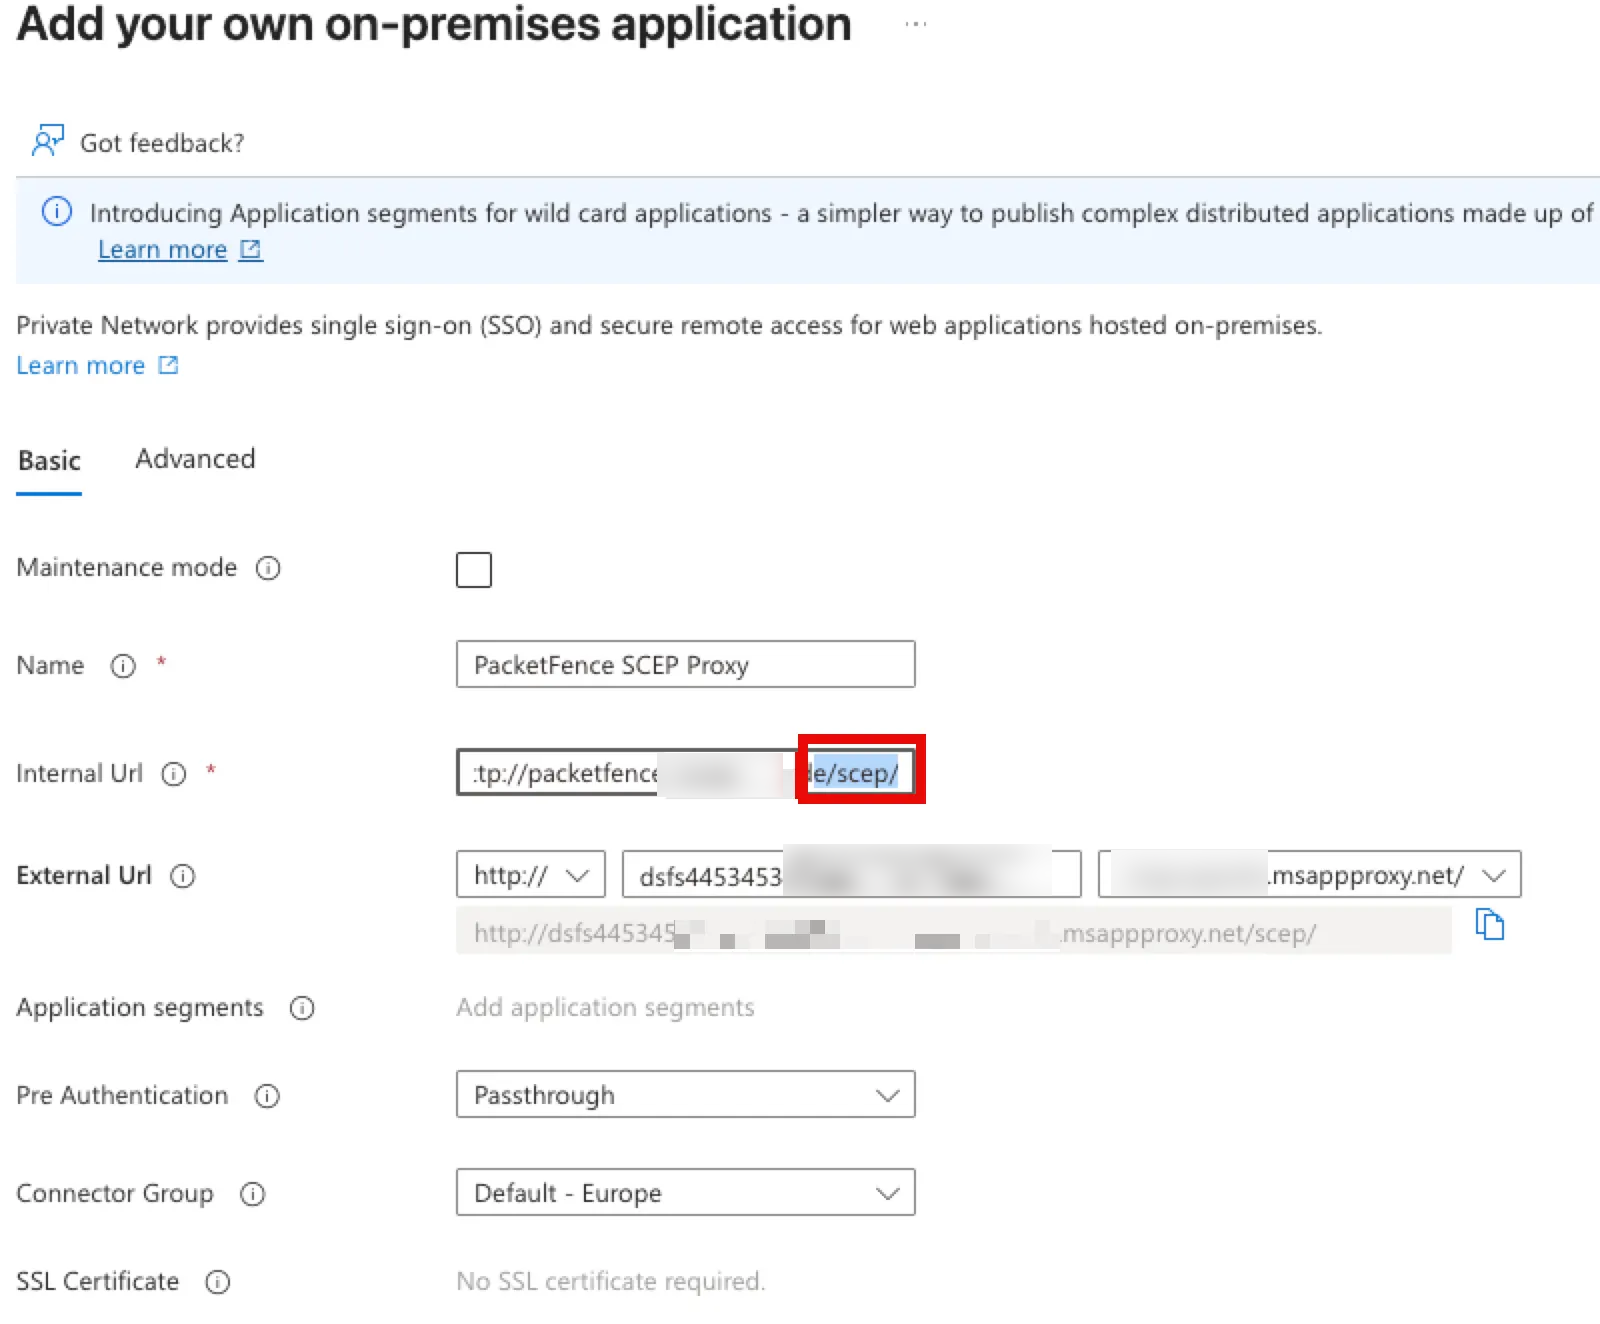 4. For the External URL:
- Use a random, hard-to-guess name for better security (e.g.,
scep-r4nd0m-n4m3) - The default
msappproxy.netdomain can be used unless you have a custom domain configured - Configure with HTTP (not HTTPS) to match the internal configuration
- Set Pre-Authentication to Passthrough - this is critical as SCEP clients cannot handle interactive authentication
Building and Using SSCEP for Testing
To test your SCEP configuration, build and use the SSCEP tool to test certificate enrollment against your PacketFence SCEP server.
Building SSCEP on macOS
# 1) Xcode command-line tools (needed for clang & make)
xcode-select --install      # one-time on a fresh Mac

# 2) Runtime & build deps
brew install autoconf automake libtool pkg-config openssl

# 3) Grab the source
git clone https://github.com/certnanny/sscep.git
cd sscep

# 4) Regenerate Autotools files
glibtoolize          # GNU libtool on macOS is called 'glibtool'
aclocal
automake -a -c -f
autoreconf           # wraps autoconf & friends

# 5) Configure - tell it where Homebrew puts OpenSSL
export PKG_CONFIG_PATH="$(brew --prefix openssl@1.1)/lib/pkgconfig"
./configure

# 6) Compile and install
make
sudo make install    # installs to /usr/local/bin/sscep by default
Testing SCEP Enrollment
# Generate a new key pair and CSR
openssl req -newkey rsa:2048 -keyout PRIVATEKEY.key -out MYCSR.csr

# Get the CA certificate
sscep getca -u http://[your-app-proxy-url]/scep/UserCert -c ca.crt

# Attempt to enroll with the SCEP server
sscep enroll -c ./ca-prefix -k ./private.key -r ./MYCSR.csr \
  -u http://[your-packetfence-server]/scep/UserCert \
  -l cert.crt -d -v
Intune Configuration
With the SCEP endpoint published, configure Microsoft Intune to distribute the CA certificate and SCEP profile to managed devices.
Installing the CA Certificate
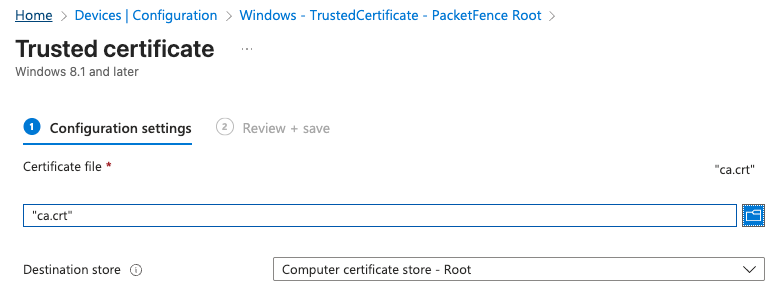
All devices must have the root CA certificate installed as trusted. Create policies in Intune for each platform:
Windows Devices
- Navigate to Devices > Configuration profiles > Create profile
- Platform: Windows 10 and later
- Profile type: Templates > Trusted certificate
- Certificate file: Upload the
ca.crtfile - Certificate destination: Computer certificate store - Root
- Target this profile to appropriate device groups
macOS Devices
- Navigate to Devices > Configuration profiles > Create profile
- Platform: macOS
- Profile type: Templates > Trusted certificate
- Create two profiles - one for User certificate store and one for System certificate store
- Target these profiles to appropriate device groups

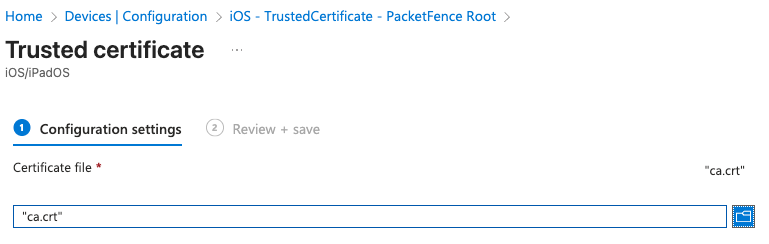
iOS Devices
- Navigate to Devices > Configuration profiles > Create profile
- Platform: iOS/iPadOS
- Profile type: Templates > Trusted certificate
- Certificate file: Upload the
ca.crtfile
Creating SCEP Profiles
Create SCEP certificate profiles for each platform, using your published SCEP URL:
http://[your-unique-name].msappproxy.net/scep/UserCertFor Windows devices, configure a SCEP certificate profile with:
- Certificate type: User
- Subject name format: Common name as email or UPN
- Certificate validity period: 1 year
- Key usage: Digital signature
- Extended key usage: Client Authentication
- SCEP Server URLs: Your published SCEP URL
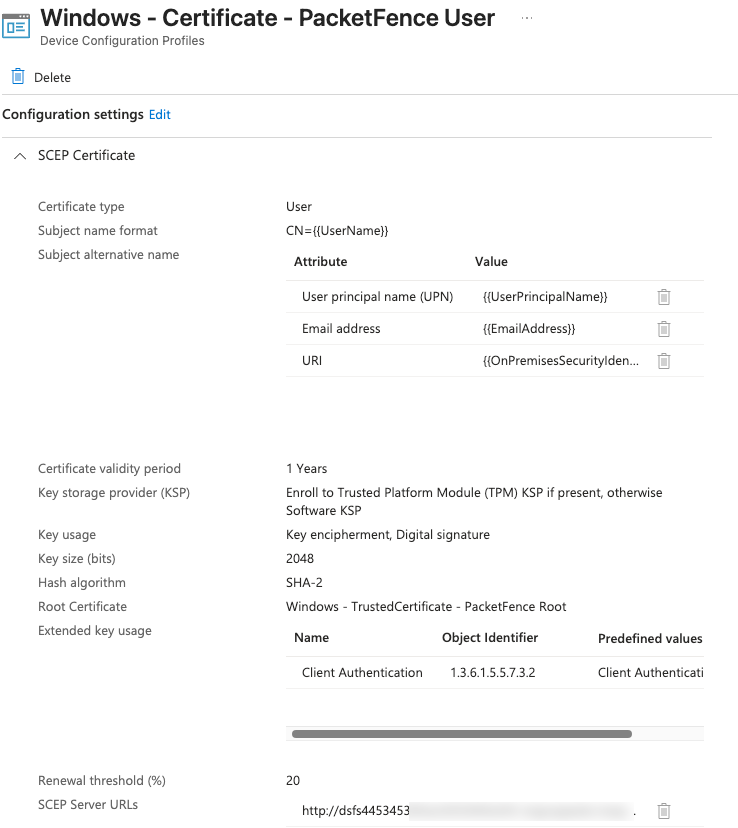
Create similar configurations for macOS and iOS devices, adjusting platform-specific settings as needed. Remember to target these profiles to the same groups that received the trusted certificate profiles.
Configuring RADIUS Clients
Configure your network devices (switches, wireless controllers, access points) as RADIUS clients. PacketFence provides detailed documentation for dozens of vendors at the official Network Devices Configuration Guide.
In PacketFence, define each network device as a RADIUS client:
- Navigate to Configuration > Policies and Access Control > Network Devices
- Add each switch or wireless controller, specifying its IP address and RADIUS shared secret
- Configure appropriate roles and access policies based on your security requirements
Example: Configuring an Ubiquiti Wireless Controller
- Access your Ubiquiti Controller management interface
- Navigate to Settings > RADIUS
- Add a new RADIUS server using your PacketFence server's IP address
- Configure the shared secret (must match exactly what you set in PacketFence)
- Set authentication ports (typically 1812 for authentication, 1813 for accounting)
- Under Wireless Networks, edit each SSID that will use 802.1X
- Set Security to "WPA Enterprise" and select your RADIUS profile
- Apply and test the configuration
Testing 802.1X Authentication
Before deploying to your entire network, test your 802.1X authentication setup using the eapol_test utility, which simulates client authentication without actual hardware.
Download eapol_test from github.com/janetuk/eapol_test.
Using eapol_test for Authentication Testing
1. Certificate-Based Authentication (EAP-TLS)
Create a file named eapol.conf:
network={
    ssid="[NETWORK_NAME]"
    key_mgmt=WPA-EAP
    eap=TLS
    identity="[IDENTITY]"            # CN or UPN in client certificate
    ca_cert="[CA_CERT_PATH]"         # Root (and optionally intermediate) CA
    private_key="[PRIVATE_KEY_PATH]" # Client certificate + key in PKCS#12 format
    private_key_passwd="[PASSWORD]"  # Password set during certificate export
}
2. Username/Password Authentication with AD (PEAP-MSCHAPv2)
Create a file named eapolPEAP.conf:
network={
    ssid="[NETWORK_NAME]"
    key_mgmt=WPA-EAP
    eap=PEAP
    identity="[USERNAME]"
    password="[PASSWORD]"
    ca_cert="[CA_CERT_PATH]"
    phase2="auth=MSCHAPV2"
}
Running Authentication Tests
# Test EAP-TLS certificate authentication
eapol_test -a [RADIUS IP ADDRESS] -p 1812 -s [PASSPHRASE] -M 00:11:22:33:44:55 -c eapol.conf

# Test PEAP-MSCHAPv2 username/password authentication
eapol_test -a [RADIUS IP ADDRESS] -p 1812 -s [PASSPHRASE] -M 00:11:22:33:44:55 -c eapolPEAP.conf
Parameter explanation:
-a: RADIUS server IP address-p: RADIUS server port (typically 1812)-s: Shared secret configured in PacketFence for this test client-M: Simulated MAC address of the client device-c: Path to configuration file
Analyzing Test Results
A successful authentication will show "SUCCESS" in the output. For more detailed debugging, view the RADIUS server logs during testing:
sudo raddebug -t 300 -f /usr/local/pf/var/run/radiusd.sockTip
When reviewing logs, you may see some warning messages about "No EAP types configured". These can safely be ignored - they are informational messages, not errors.
Troubleshooting
MySQL Database Permissions
If you encounter errors related to database access, ensure the MySQL user has appropriate permissions:
mysql -u root -p       -- or: sudo mysql
GRANT ALL PRIVILEGES ON pf.* TO 'pf'@'localhost';
FLUSH PRIVILEGES;
Detailed RADIUS Logging
To view detailed logs from the RADIUS server:
sudo raddebug -t 300 -f /usr/local/pf/var/run/radiusd.sockDatabase Configuration
If you need to change the database password or check the current configuration:
-- Change MySQL password
ALTER USER 'pf'@'localhost' IDENTIFIED BY 'new_secure_password';
FLUSH PRIVILEGES;

-- Update grants if needed
GRANT SELECT,INSERT,UPDATE,DELETE,EXECUTE,LOCK TABLES ON pf.* TO pf@'%' IDENTIFIED BY 'new_secure_password';
GRANT SELECT,INSERT,UPDATE,DELETE,EXECUTE,LOCK TABLES ON pf.* TO pf@'localhost' IDENTIFIED BY 'new_secure_password';
FLUSH PRIVILEGES;

-- View database configuration
/usr/local/pf/bin/pfcmd pfconfig show resource::Database

-- Reload configuration
/usr/local/pf/bin/pfcmd configreload hard

-- Restart PacketFence services
sudo /usr/local/pf/bin/pfcmd service pf restart
After password changes
After changing the database password, you'll need to reconfigure any secrets for integrated services like Entra ID App integration.
Conclusion
You have now successfully set up PacketFence as a Network Access Control solution with PKI integration and Intune connectivity. This configuration provides several key benefits:
- Certificate-based authentication eliminates password-related vulnerabilities
- Automated certificate deployment reduces administrative overhead
- Integration with Intune ensures only managed devices receive certificates
- Centralised policy enforcement improves security posture
Remember to regularly backup your PacketFence configuration and update the system to maintain security. Consider implementing regular certificate rotation schedules and monitoring for authentication failures that might indicate configuration issues.